


|
Butterfly Drawing Made Easy.
Butterfly Drawing often looks complicated because of the bewildering variety and dazzling array of colours. In fact these beautiful insects are quite easy to draw. Their bodies follow a shape pattern that once learned is very simple to apply to all species with a few adaptations. Learn this method in my free drawing lesson and you'll be able to draw straightforward, recognizable butterflies in a short space of time. From there you can go as detailed as you wish. Learn how to draw a butterfly first and then move onto colour work, whether pencil, ink, watercolour or oils. 1, Draw this cigar shape. 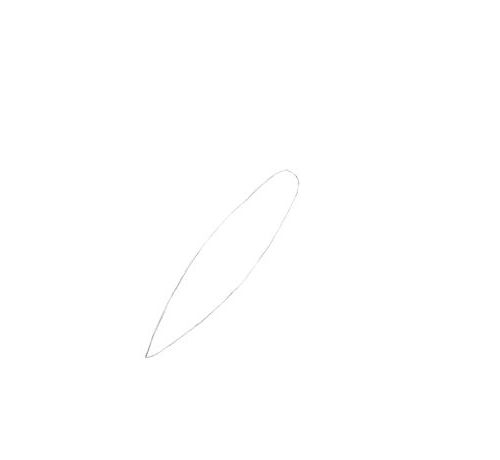
2, Add these curved lines. The top three are evenly spaced. The bottom line should only nip off the end of the shape. 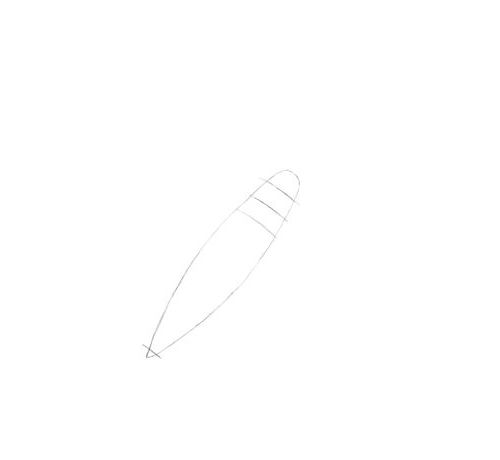
3, Sketch the top wings as illustrated. Keep your line light and don't labour at it. See how the wing starts at the middle line and curves around to the next line. Make each wing about the same length as the cigar shape. 
4, The bottom wings start just before the first wings flatten out. Ensure they extend lower than the bottom tip of the cigar and curve them to meet the bottom line on the cigar. 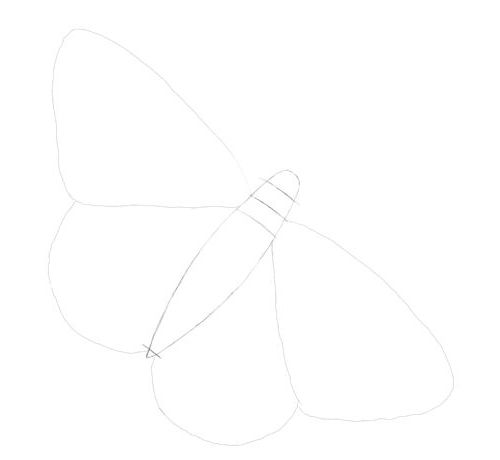
5, Draw the wings in more detail as shown. Draw the body of your butterfly. Note how I have used the cigar with its dividing lines. See where the head is? It's between the second and third line. Copy the body carefully. 
6, Now add the antennae and details on the wings. Always keep your line light and do not try to control the tip of your pencil too much. A little shake here and there will aid you. It will add to the ethereal effect that we want to portray. See how sketchily I draw the veins and markings. 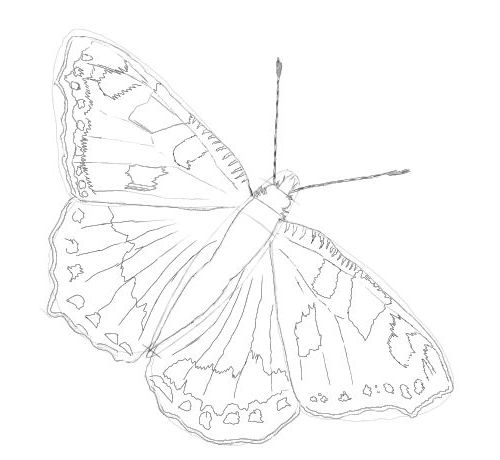
7, Butterfly Drawing finished without the guides. 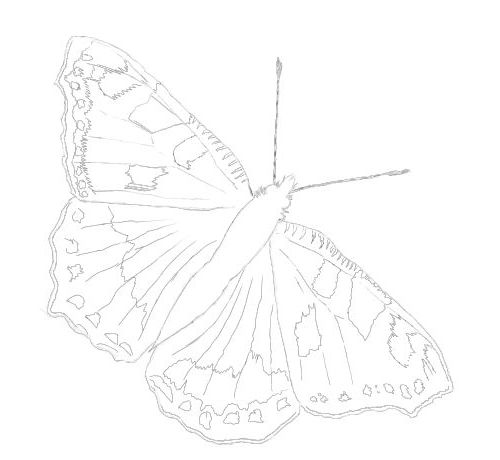
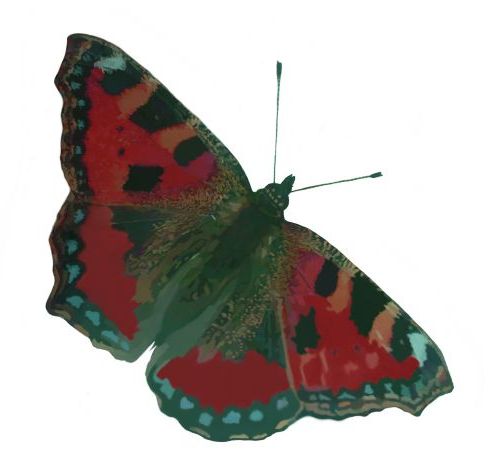
I went on the transfer my drawing to board and did an acrylic colour study of my butterfly.
Return from Butterfly Drawing to Drawing Animals Home
|
