|
Two Hand Drawing Tutorials in Pencil.
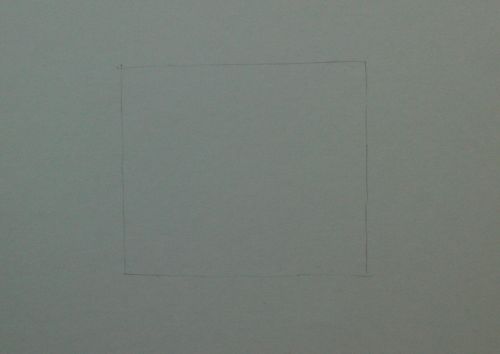
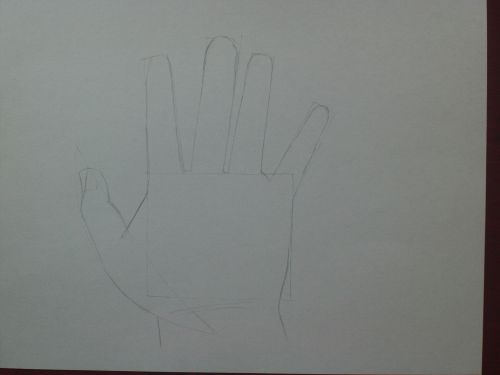
Hand Drawing in two free art lessons. This subject is one area of drawing people that causes so much anxiety. It doesn't have to. A serious study of human anatomy, say through female figure drawing or any other area is a long process of learning but a basic drawing is easy to learn in this step by step drawing process and once you grasp the fundamentals you can take your studies as far as you want to go. The first exercise is very easy and the second more advanced. In both exercises I used my own left hand as a model. The more advanced drawing lesson is my left hand seen through a mirror. Materials: Basic and Easy. 1, The palm or back of the hand can be represented as a square or rectangle depending on the size and angle of the hand you are drawing.
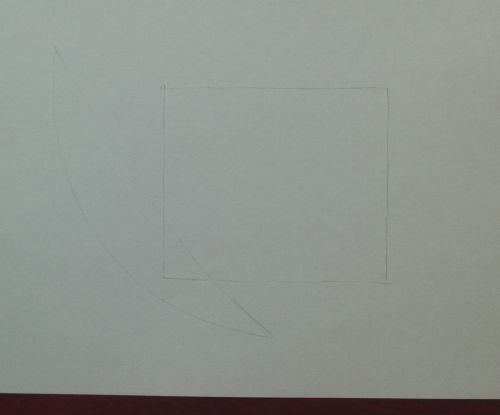
2, Draw this boat shape as shown.
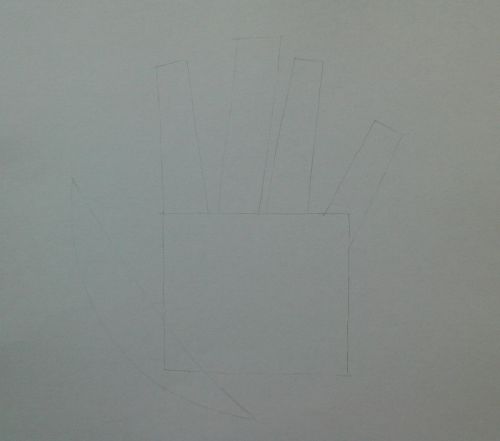
3, Next draw these long rectangles. They don't have to be exact. Note the gaps at the bottom where they join the square. The gaps are slightly different. Hold up your own hand in a similar pose. Your index, middle and ring finger are spaced pretty much the same, although there are variations between people. The important thing to note though is that most of us have a little finger which appears to be further away from the ring finger whenever the hand is spread. A small but important detail. The second thing to note is that the back or palm of the hand is approximately the same length as the middle finger.
4, Now draw in the hand using your guides.
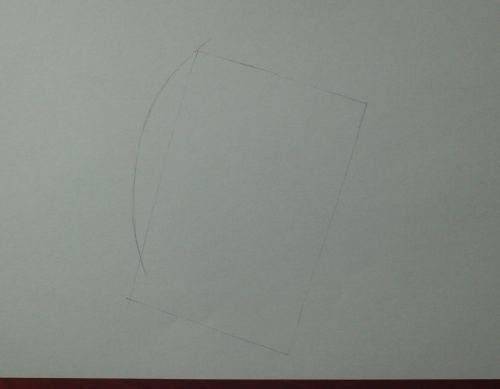
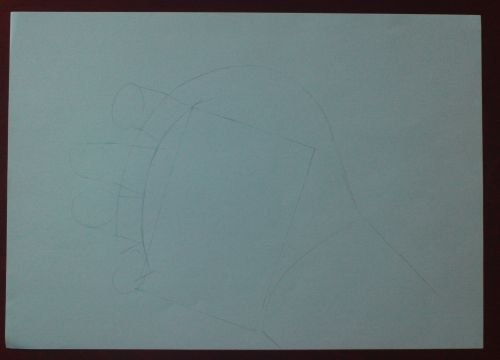
Hand Drawing in more detail. 1, a rectangle, doesn't have to be perfect just ensure its as near to the length and width of the hand as possible.
2, This arc represents the fat pad at the base of the fingers. Sometimes I use this feature and other times I don't but here I'm trying to be accurate so the more I cover at this stage the easier it will be to complete an accurate drawing.
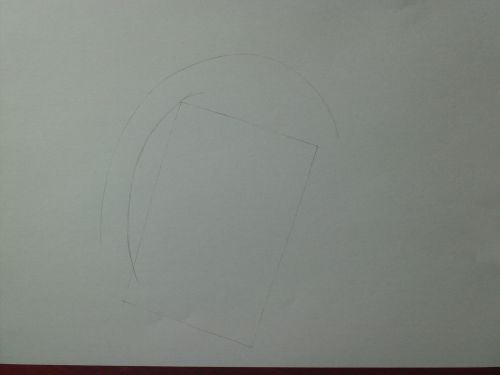
3, This long curving line will help me judge the thumb and the portions of the fingers attached to the palm.
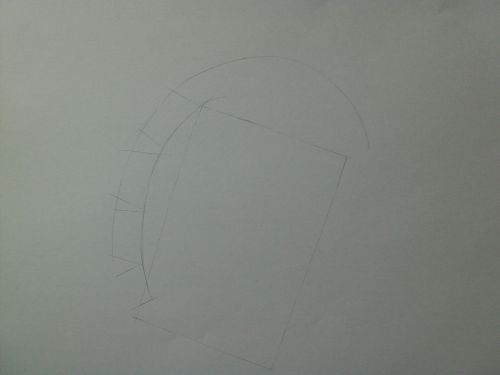
4, Now I indicate where the fingers will splay from the fat pads. Hands obey the laws of perspective like everything else so from this angle the finger will thicken as it comes towards us slightly. If the fingers were held out as in the first drawing they would be narrower.
5, I use lines and lozenge shapes to finish this stage of the fingers. I always find leaving the little finger to the last helps me. The others are fairly similar in terms of thickness. I use the curving line to join the hand to its wrist. You'll note the wrist is a tubular shape made up of two lines and a slightly curved line.
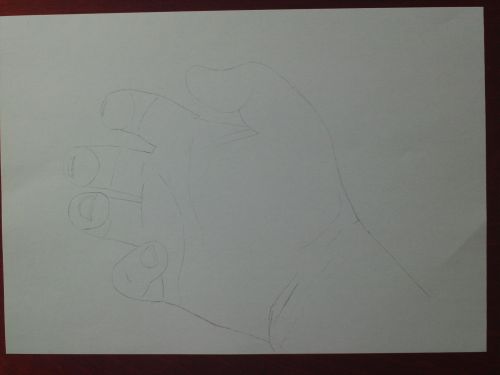
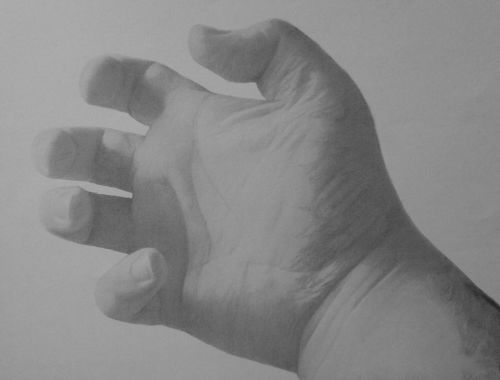
6, I feel I have enough help here to aid me in my drawing. Now I refer to my reference (in my case I am holding my left hand to the mirror to make a right hand) and place another sheet of paper over my shapes and then do a slow line drawing. Don't worry if you take several attempts and need to draw and redraw. There's no hurry. This is reproduced much darker than in reality.
Adding Tone
1, Now I add tone. Do this slowly with a 4B pencil. Use the side of the pencil and add stroke after stroke. Here I add more pencil to the darkest areas. Even the lightest parts are covered with tone albeit very light.
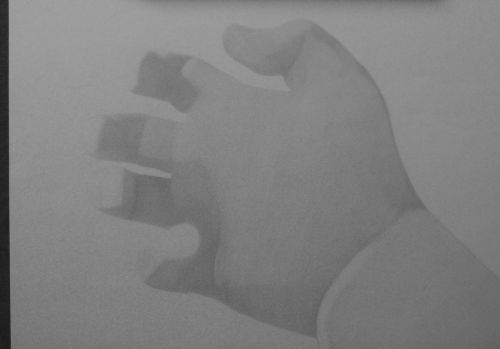
2, I blend the pencil at this point using a small chamois leather and cotton buds where the leather can't go. This is a gentle process. Once I have a smooth surface with little sign of individual pencil marks I switch to a 6B pencil. I have deliberately worn down the tip to a chisel shape by scrubbing it against paper.
3, I add details. Fingernails where visible, deeper shadowed areas such as the heavier creases. The wrinkles on my palm and all the furrowed skin. It looks detailed but is it really so detailed?
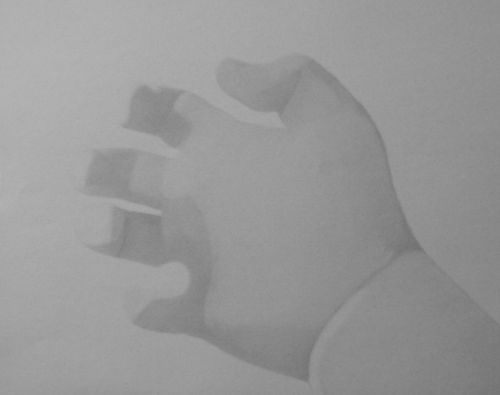
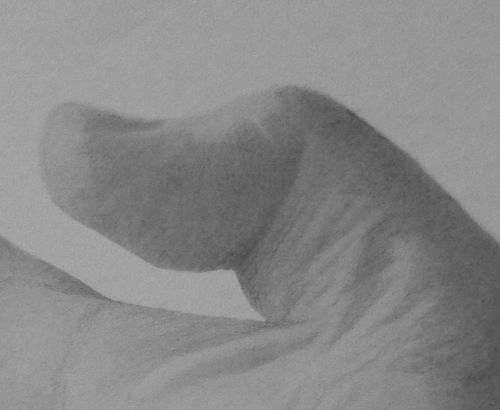
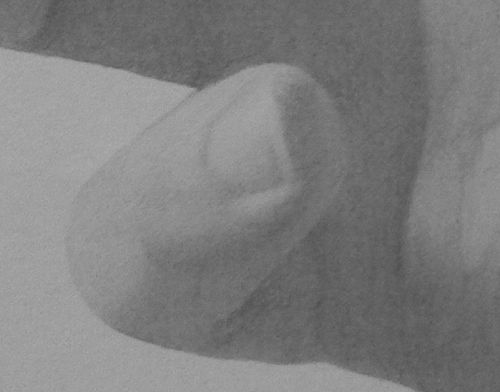
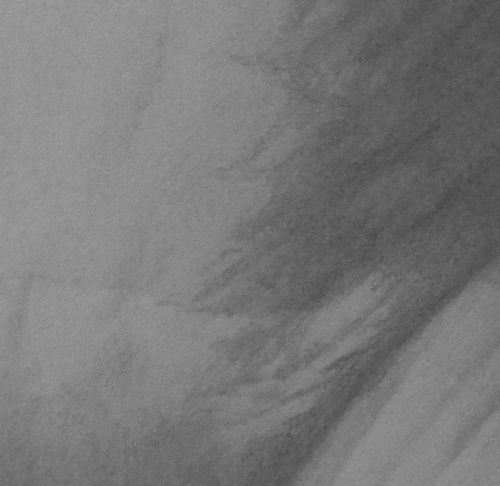
Look at these close ups and judge for yourself. Look at how I create texture with the chiselled edge of the pencil. The shape of the pencil does most of the work for me. All you need to do is observe your reference closely.
See the nails? They are simply areas of tone lined up where our initial line drawing guided us.
The creases at the bottom of the palm are dashes and shapes and you can see where I have stippled areas.
The key here is patience, observation and a gentle touch with your pencils. I love scribbled sketches but have to change gears when adding tone. If you can draw in quiet moments and really lose yourself in the drawing you'll find yourself improving quickly. Use your own hands or ask relatives and friends to pose. Take photographs if you like to see details like wrinkles and folds at your leisure.
Back to Drawing People from Hand Drawing Home
|