


|
Rose Drawing Tutorial
This Rose Drawing was completed with coloured pencils. I find them excellent for drawings of roses because they can produce very subtle gradations of colour. This is ideal when drawing flowers. I'm beginning to really love Faber-Castell polychromos coloured pencils. They're subtle. I prefer my work to appear muted rather than overly brightly coloured although with the right drawing technique bright colours are easily created using them. Although this method is quite time consuming it can be a great help when working out colours and relationships between colours in preparation for a painting and of course they are a medium in their own right. Many artists have developed amazing technical skills, producing incredible art. Here's how I accomplished my Rose Drawing.
Materials A sheet of fine sand paper. Typing paper and cartridge paper, HB and 6B derwent graphic pencils. Colour pencils are Scarlet Red, Dark Flesh, Cadmium Yellow, Pink Madder Lake, Fuchsia and burnt sienna.
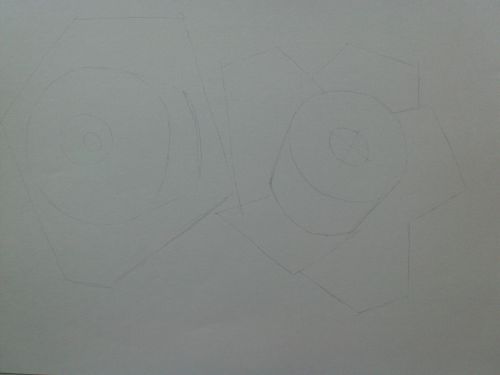
Rose Drawing Stage 1 - The Breakdown1, I started by breaking the roses down into basic shapes with the HB pencil on typing paper. Roses are quite complex looking and can seem an intimidating subject so I tend to look at them as a central area surrounded by individual petals. It's always easier and time saving to think in stages and this is even more important with a challenging subject. A step by step drawing is a way to avoid feeling overwhelmed and discouraged. I started with the outer central area as a circle tipped at an angle.

2, Here I indicate the centre of the flower as if it is a funnel, which you could say it actually is.
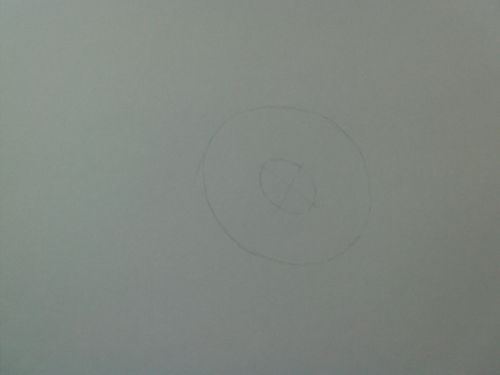
3, I draw in the sides of the funnel.
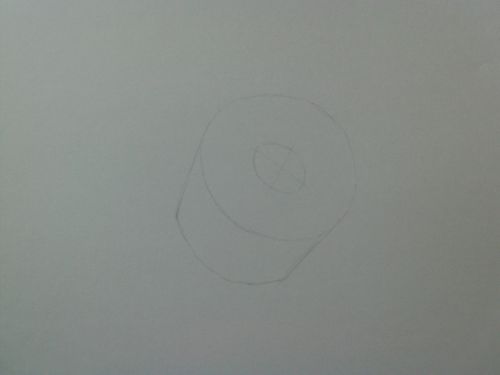
4, The most outlying petal.
5, Now I draw the rest of the petals in.
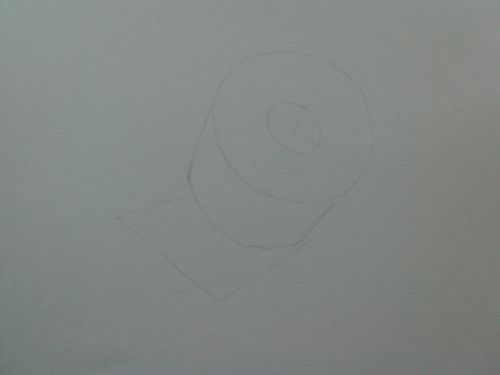
6, The second rose is drawn in a similar way but because it's at a stronger angle I use less shapes. It is an easier drawing with fewer angles to the petals so I need less guidance.
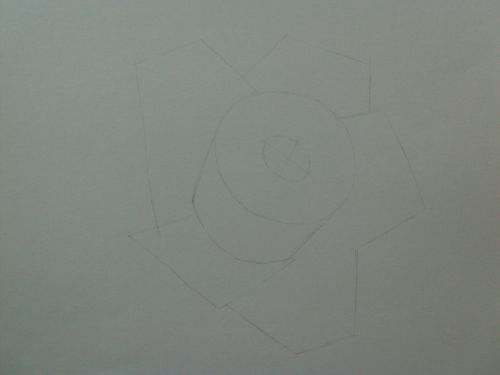
Rose Drawing Stage 2 - Line Drawing7, Now using my shapes and referring to the roses I make an accurate line drawing. I used a 6B pencil to make dark lines.
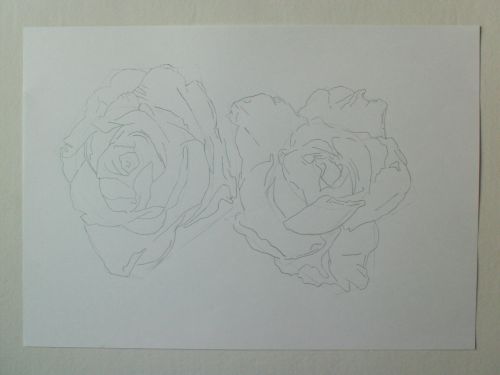
8, I trace the roses onto another sheet of paper. I could have used tracing paper or used my light box but I could see the dark lines through the second sheet. I used a red pencil and drew very lightly.

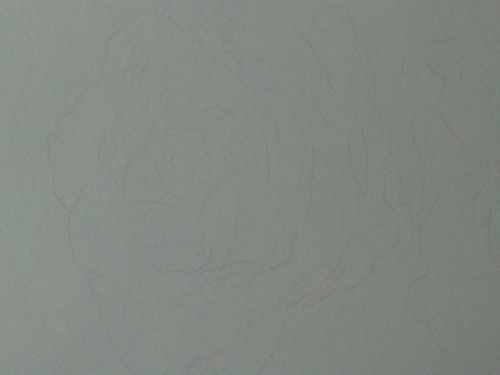
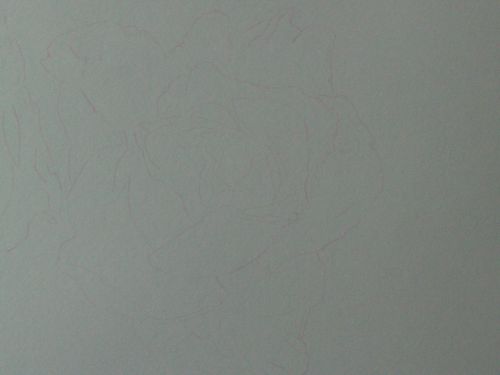
9, These close ups will make it easier for you to see.
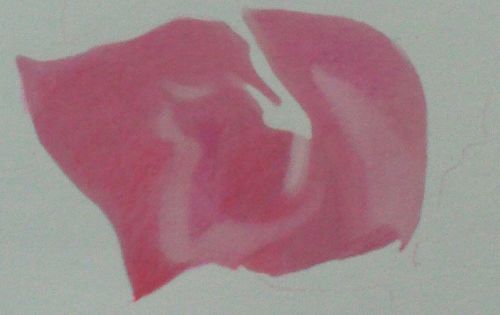
Rose Drawing Stage 3 - Colour Pencil Stage10, I used six pencils. Scarlet Red, Dark Flesh, Cadmium Yellow, Pink Madder Lake, Fuchsia and burnt sienna. I start in the centre and work my way outwards. I lay dark flesh, scarlet red and pink madder lake side by side using the side of the pencils.
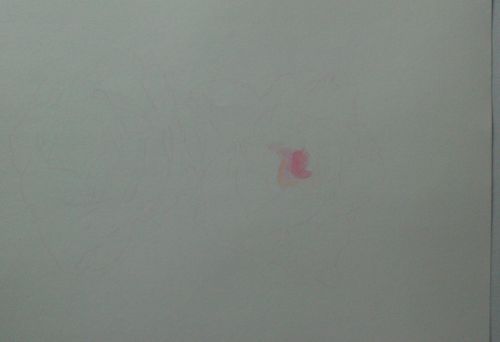
11, I keep moving outwards laying colour gently within the lines always referring to my subject.
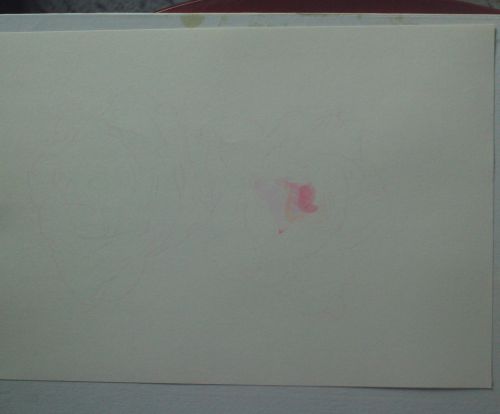
12, Now rather than covering the whole in colour at once I concentrate on this small area. I simply add more layers of each colour gently until it seems I cannot add more colour without using more pressure. Next I add a layer of fuchsia over all the colours using pressure. Then I take my small piece of sandpaper and place it on top of the colour. I do not rub the surface as this would ruin it. I hold it down and put a little weight on it. This digs into the surface and gives it a little more tooth. I can now add more colour but I don't use the side of the pencil. I use the tip and make small motions in all directions. I can also make tiny circular movements. This gives more depth to the colours as I can consciously fill in the valleys and indentations of the paper's surface. This is why I tend to colour one small section at a time. I find it easier to roughen up the surface with sandpaper a little area at a time.
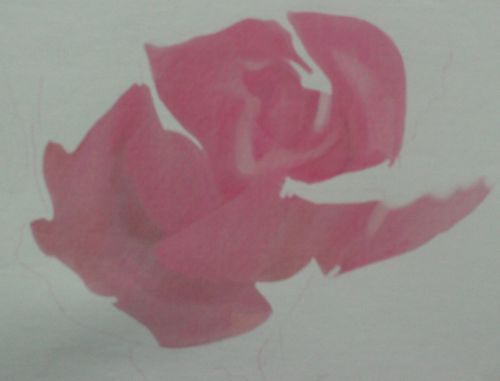
13, Here we see the colour beginning to fill the surface effectively. The less grain you see left in the pencil the closer you are to the desired effect.
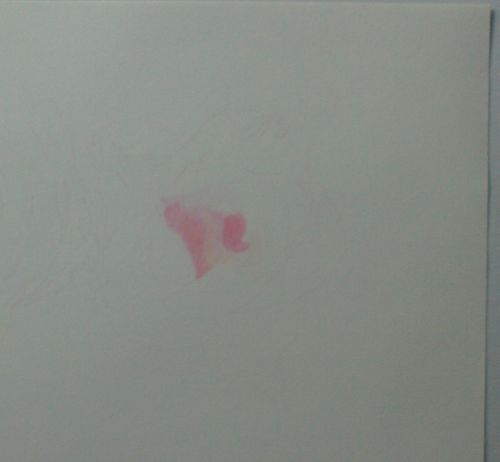
14, After adding more pencil to the layers already done I expand outwards. Next I use the white pencil and rub it over the all the colours. This is called burnishing and can be made with any lighter colour over a darker one but I prefer white. Use heavy pressure here. This will in effect melt the wax helping to fill the entire tooth of the paper making the colours denser. You may also be able to detect a slight blend between colours depending on the brand of pencils you are using. With this particular type of Faber-Castell pencils you don't see any blending but it doesn't matter either way although it is not our goal in this drawing to create blends. If you have saturated the paper with layers of colour as I have, burnishing will make the surface shine. This can be quite magical to look at.
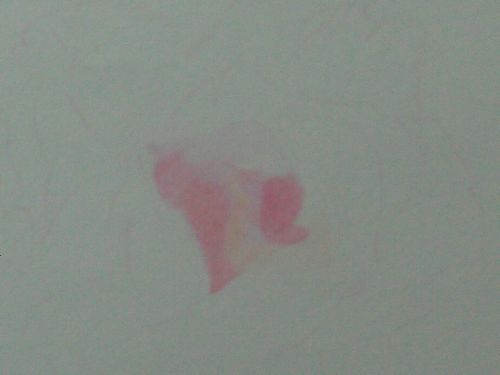
15, I repeat the process, moving outwards. I use the burnt sienna and cadmium yellow as well as the first three colours. Then I repeat the step in stage 12 and rub Fuchsia over all the colours. This helps harmonize the colours which are well matched to begin with. Burnish again for the same effect.
16, I use lighter tones of the same colours on the outer petals and then do a final burnish.
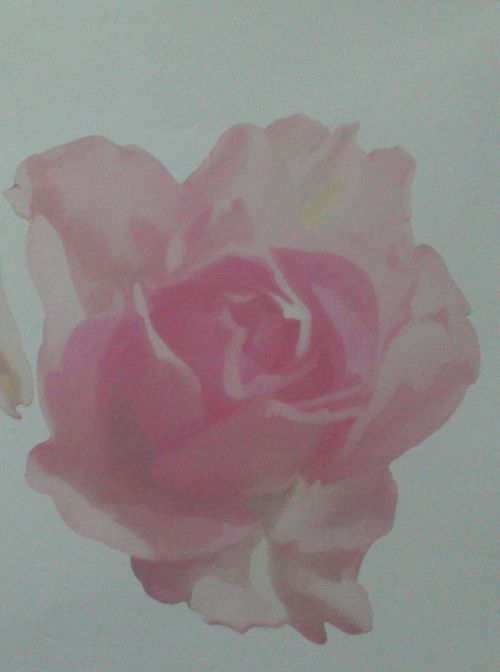
This is the left hand rose. It was completed exactly the same way. Why not try to copy this after you've completed the first rose?
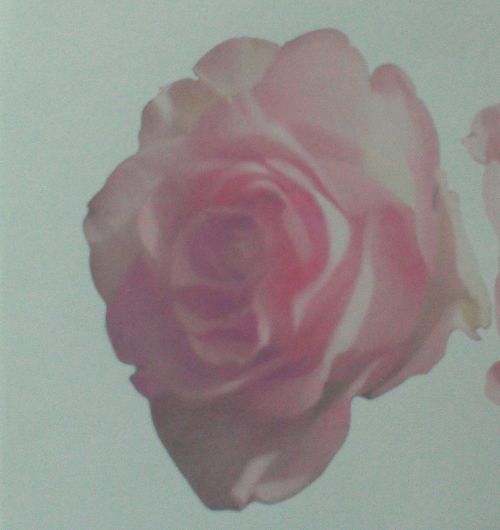
The entire Rose Drawing.

Return to Painting Flowers from Rose Drawing. Home
|
