


|
Eagle Drawing.
Eagle Drawing is easy if you follow this three in one free drawing lesson. 1, Draw a dome and cut it in half as shown. 
2, Draw a second dome with steeper sides. Position it in the right hand portion of the first dome. Ensure it stands outside the first dome a little way as illustrated. 
3, The eye is a rough circle within a circle about two thirds up the first dome. It should touch or better still slightly straddle the dividing line. 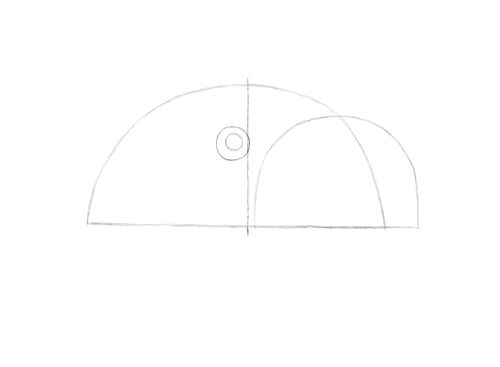
4, Surround the eye with an oval that ends in a gentle point. Now an important part of an Eagle Drawing from the artists point of view is the brow. This makes birds of prey look as if they are frowning. It is instantly recognizable as a raptor characteristic. 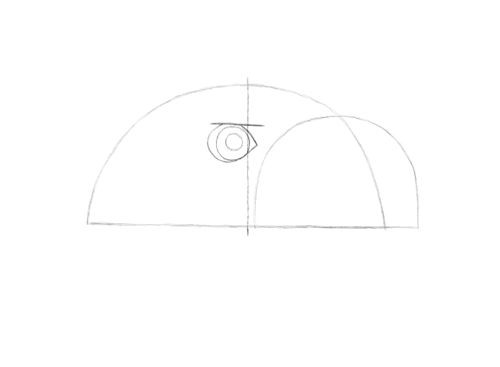
5, Take your time with the beak. The smaller dome is your guide to draw a great looking curve going down to a point. The rest of the beak and mouth are contained within the dome except for two small areas as you can see. 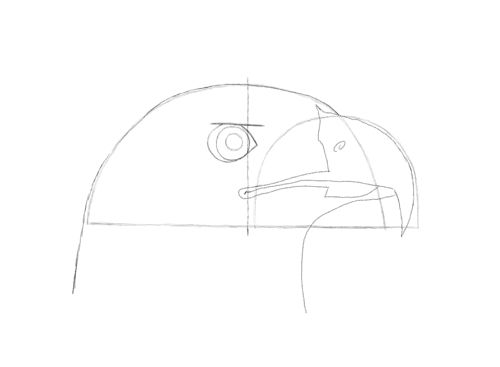
6, Here is the head without the distraction of our guidelines. 
This is a neat little exercise if you are going to be drawing eagles from life. Knowing this method will enable you to get down the basic shapes quickly.
Now we will tackle a full Eagle sketch. It isn't always straightforward when we try to break a subject down into easy shapes. Sometimes geometric shapes do not work. My approach is to make up my own shapes when necessary. It isn't a difficult task. Follow how I tackled a standing bird of prey. 1, I drew this cap like shape which is just a slightly squashed dome. 
2, The second shape which will be our guide to the body looks like the abdomen of a wasp. 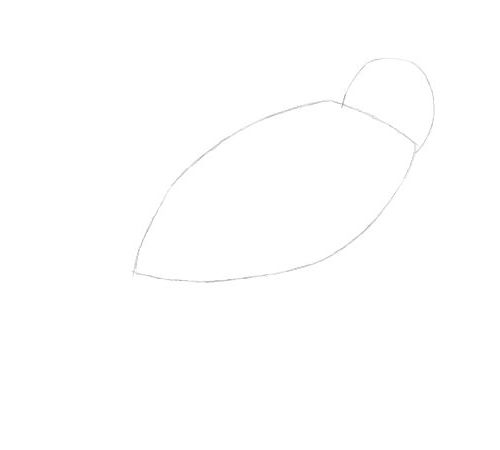
3, I jump into sketching the wings and tailfeathers. Look closely and see how simple these lines are. 
4, I draw the legs in. Note the lower legs and talons are only sticks. I add a mound to show the bird is perched. 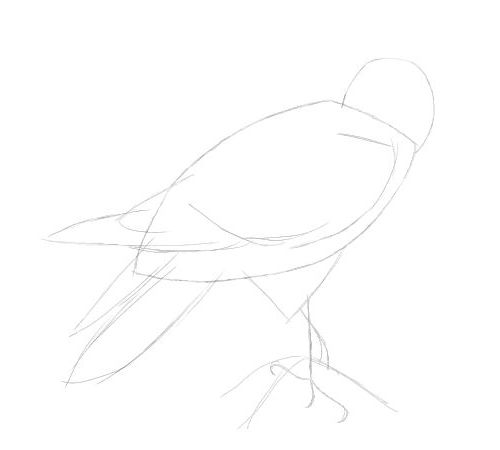
5, Now I indicate the eyeline and beak. This is very similar to my approach when drawing a human head. 
6, I add simple detail using the shapes as a guide. I draw the eyes on the eyeline, the beak on it's own line. The lower legs are merely thickened versions of the stick drawing. I put a few lines along the feet and legs which makes them look more accurate. I suggest a few feathers on the wing and tail. 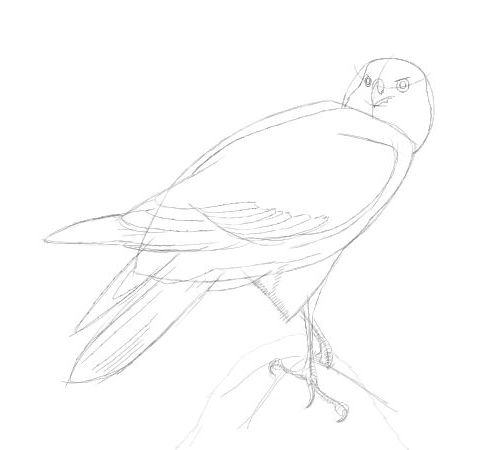
7, Take away the guidelines and add any more details you wish. 
The drawing is ready for further development as a more detailed drawing or as the basis of a painting.
In this final lesson on Eagle Drawing we will draw an eagle in full flight. 1, Start off with a triangle. Your eagle's body and head will be contained in it. 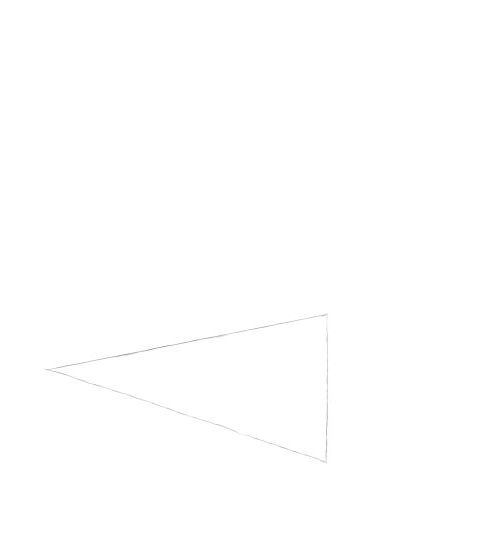
2, Now, as shown, draw a rectangle that is slightly wider at the top. Your eagle's far wing will be contained in this. Eagles have large wings that in most species spread out like long fingers and this is why the rectangle needs that extra width at the top. 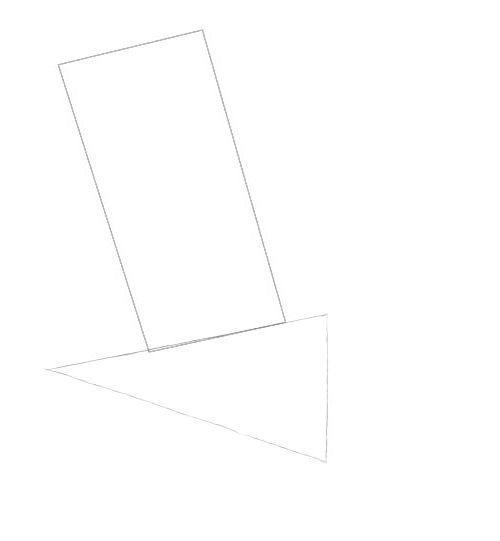
3, Another rectangle. Make this fairly equal at either end. It will be wider and shorter than the first rectangle because the nearside wing is closer to the viewer and angled differently. This is quite an important drawing tip. Draw it exactly as illustrated ensuring the bottom right corner is in line with the right of the triangle. 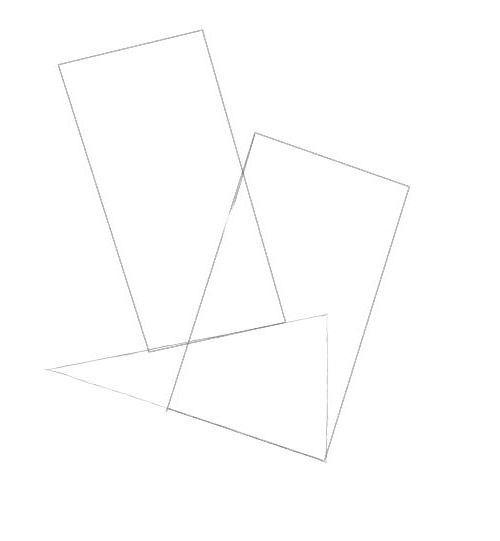
4, Draw a second triangle as shown. It will be smaller than the first. This is where you will draw the tail feathers. 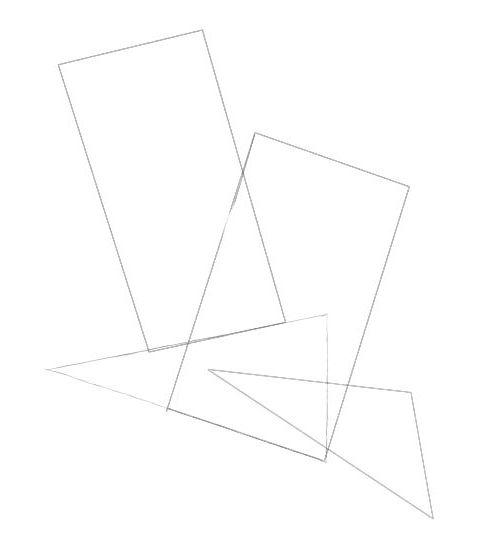
5, As above, in the first lesson on eagle drawing, draw a dome where the head will be. Split the dome in half. You can draw the head exactly as I showed you earlier if you wish but if you want to be really accurate follow what I do here. Because the head is thrusting forward you need to adapt what I showed you earlier. Adapt only slightly. It is worth that bit of extra effort to get an accurate drawing. 
6, Draw the entire head within the dome this time. Place the eye to the right of the halfway line. Copy my drawing. Note where the lines of the body are. See they are contained within the shapes. Draw the wing within the rectangle. 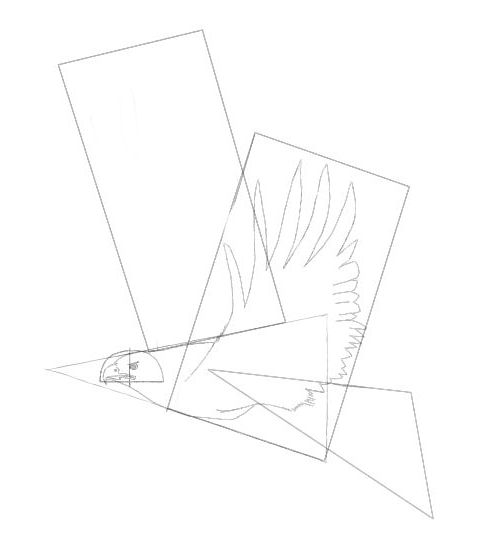
7, Draw the lower part of the body still in the first triangle. The tail feathers are in the second triangle (don't worry about the odd feather creeping outside) and I draw a simple, single foot. No need to draw a second from this angle unless you wish to. 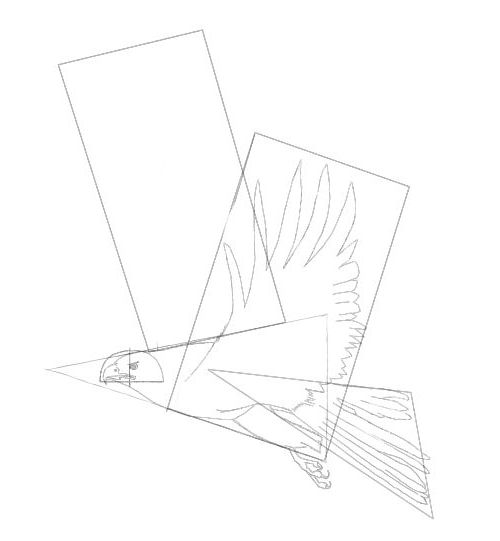
8, Finally draw the far wing within the first rectangle. Note how the wingtips spread out. Add a few feathers as illustrated. 
9, The final drawing without guides.

I hope you have enjoyed this free drawing lesson on eagle drawing. Please feel free to look at all the material on this site. All tutorials on from-sketch-to-oil-painting.com are completely free. Happy Drawing!
Return to Drawing Animals Return from Eagle Drawing to Home
|
