


|
Cat Drawing Tutorial in Pencil.
When Cat Drawing choose an interesting angle where possible and show natural behaviour over a simple pose, when possible. This always adds to the reality of a drawing. Draw from a photograph, life or using your own sketches as a guide. Materials used 4B and HB derwent graphic pencils, a putty eraser and a scalpel or craft knife to shape it. The heaviest cartridge paper you can get hold of, typing paper and either tracing paper or a light box. I have a little craft light box I use occasionally. It is helpful when I want to avoid the mess of tracing paper. A chamois leather for blending. Some Q tip(cotton buds) also for blending. Cat Drawing Stage 1 1, As in other tutorials I break the animal down into easy shapes. Here I am using an angled dome drawn with the HB pencil on typing paper.

2, I use a triangle for the left ear (our viewpoint) and a rectangle for the ear nearest us.
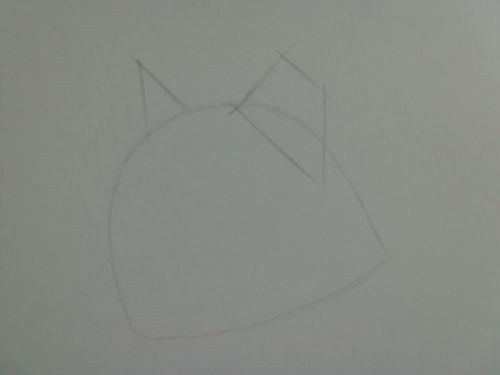
3, I indicate the body and leg of the cat. The leg is divided at the joints.
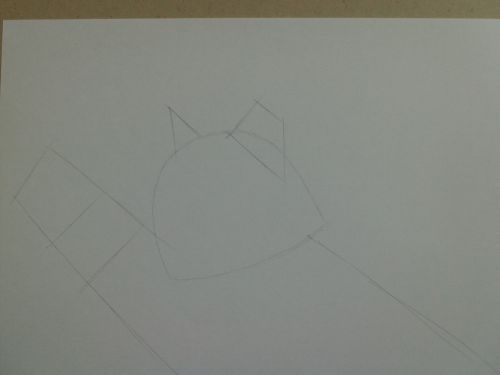
4, I draw in where the eyes should go.

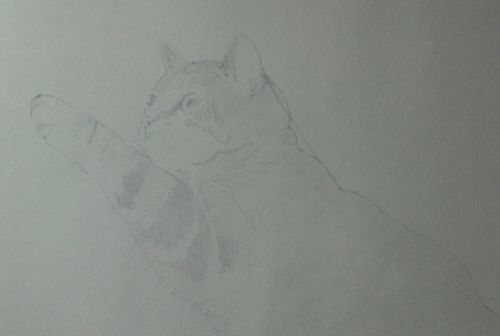
Cat Drawing Stage 2 5, Now I draw the cat using my light box with my 4B pencil. I laid the cartridge paper over the typing paper and using the guides and my reference sketches gently drew in the animal using simple lines. You can avoid using lines at all if you want to attempt a purely tonal drawing but if you are gentle with the lines you can easily obscure them with tone in any event and an observer will not be able to tell the difference.
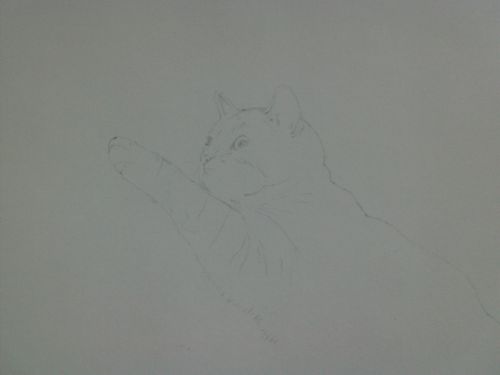
6, I continue slowly and gently.
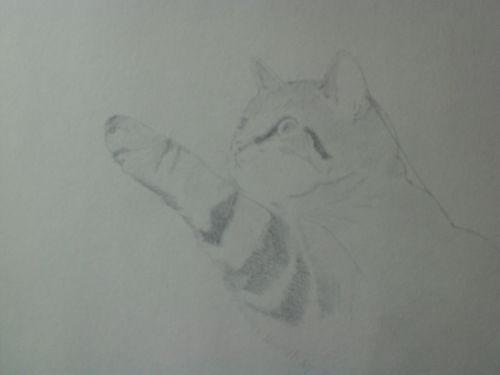
7, I add tone to the cat's body and head, again very gently. It can be tempting to rush but this is to be avoided. Better to stop and do something else for a while than hurry and spoil the work.
8, See here? There is an entire added layer of tone over the body and head than in the last illustration but it is barely noticeable. That is how gently and patiently I am adding tone.
9, Note I decide to change the back of the cat's head here. I didn't like the bulbous head. It looked at odds with the cat's pose so I drew in a line indicating a straighter form. I will always change or even abandon a drawing at any stage if I think it necessary.
10, I define the facial features a little more. This gives it a more three dimensional look. I would say when trying to achieve this be very careful with adding tone. The light and shade rules are generally that dark goes back and light comes forward. As the face pushes towards us I am sparing with the pencil and conversely as the head recedes I add pencil. I hope this makes sense.
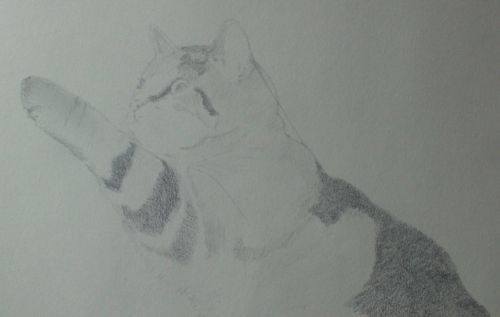
11, I build up more tone on the leg.
12, I continue. Now I begin to add the patterns on the cat's face.
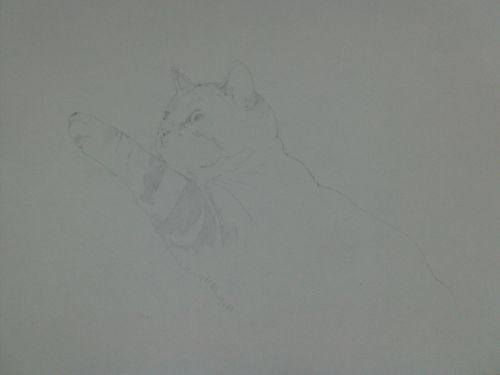
13, I go darker, now approaching the darkest I am willing to go.
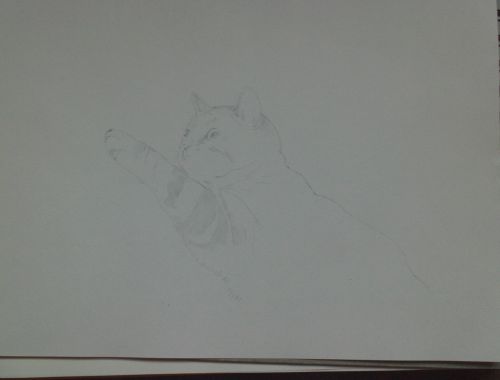
Cat Drawing Stage 3 14, Now I smudge the drawing with a small piece of chamois leather. I wrap it around the end of the pencil. For the tips of the ears and other small areas I use the Q-tips. There's nothing difficult about this but it does require practice. Just use little pressure and work at the same slow rate. You'll be surprised at the results. Add more pencil where necessary and continue to carefully blend.

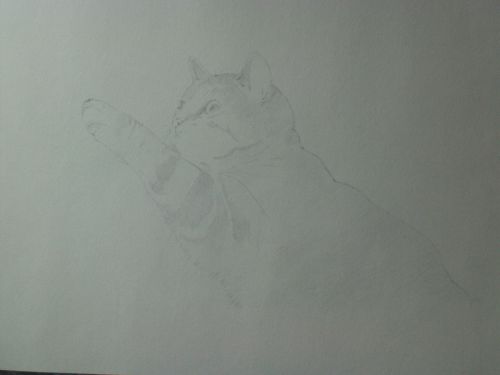
15, Once happy with the head and leg I go back to using the 4B pencil on the body. I blunt the tip of the pencil by wearing it down on scrap paper and then use firm pressure to add more tone to the body. The worn tip will enable you to add dark pencil without ruining the paper. I vaguely drew in where I wanted the patterns of the animals coat and then obscured them with pencil. If you do this you will still just about be able to see the patterns. This will help you with the next stage.
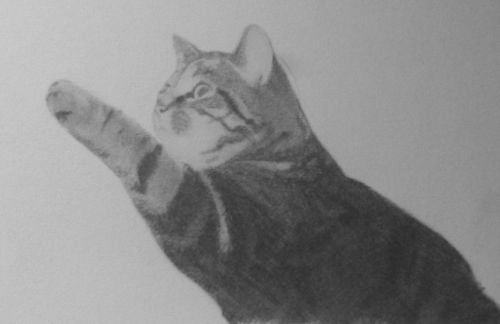
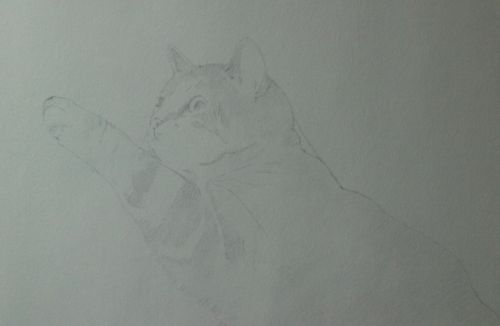
16, Now I used my putty rubber to remove pencil giving the illusion of the cat's coat. The advantage of the putty eraser is that I can mould it or even cut it into any shape. I vary the pressure and angle of the eraser as well as using a sharp edge made by slicing away a corner of it with a craft knife. The edge lifts out little dashes of pencil.
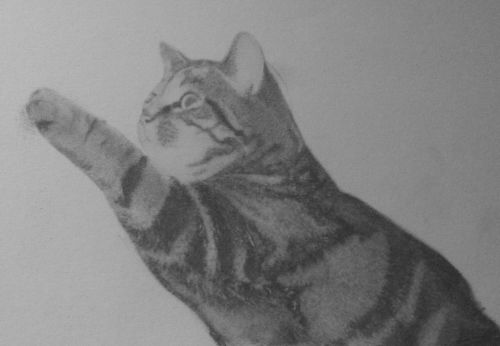
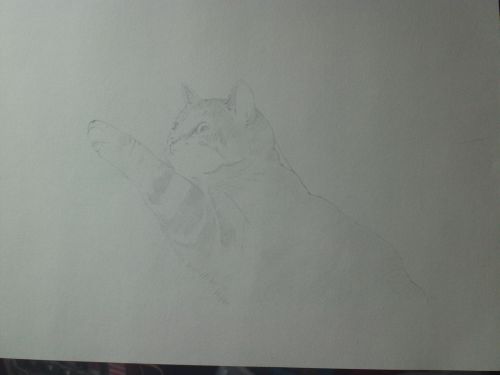
17, I continued to lift out and use the pencil to refine the edges of the lighter areas of tone. I also work over the lighter areas and blend where necessary. Finally I clean up the paper where I've smudged it making it tidy.

If you have enjoyed this page on Cat Drawing you may also be interested in
Cat Painting
Return to Drawing Animals from Cat Drawing Home
|

Drawing Animals Ebook
Learn how to draw animals in pencil with this huge 486 page ebook.

Or ask SBI directly how they can help you build a high traffic, highly profitable online business. Find Success with SBI!