


|
Painting Flames
Painting Flames in oils is made easier if we use Blending I recommend you review the tutorial by clicking on the link before you start Painting Flames. I'm not advocating setting fires but if you, for instance, burn garden rubbish then you have the opportunity to quickly sketch or take photographs as reference. I am not a fan of using photos as a general rule because they can easily and often subtly distort reality which can have a bad effect on your painting. That said, flames are so haphazard any distortion will be meaningless in any event so snap away to your heart's content. For this exercise in painting flames we will work wet in wet which is basically the same as alla prima. Work quickly when painting. You'll slow down when we start blending. I used heavily primed (with titanium white acrylic) canvas paper. 2 inch Flat and #4 Round. Oils are Winsor and Newton Artists Oil Colours, thinned with mineral spirits. A sheet of blotting paper will come in handy, though it is not essential. 1, Aim for loose pencil lines that curve even when ending in points whenever fire drawing. 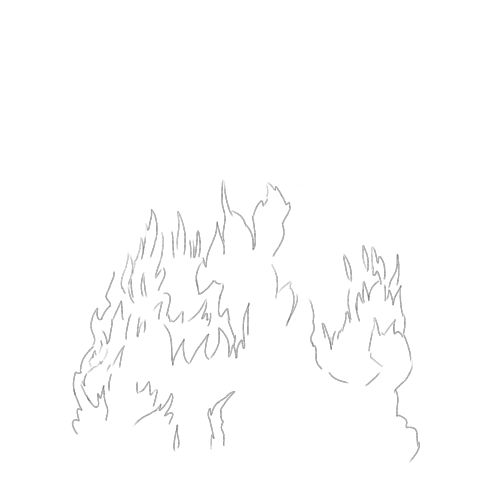
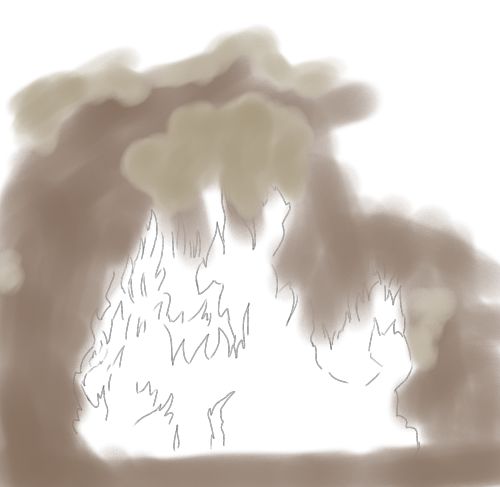
2, I used burnt umber that I left out on blotting paper for twenty minutes before using. This soaked up some of the oil content. Do this for each colour you use on the background. We will treat the flames differently. You can leave paint out in the air for a few hours if you prefer but it isn't as precise a method because oils don't dry in the way that water based paints do. Use the umber loosely as illustrated. Scrub it on the paper in fluid motions with the 2 inch brush even though the paint will not feel fluid. It will not give you full coverage and that is fine because that is what we want. Painting flames realistically requires a step by step controlled method.

3, Add a little viridian to the umber (or your choice of green) and a tiny amount of ivory black. Many people will not use black because it 'deadens' the canvas. Used sparingly there is no problem. Sometimes I want to deaden the canvas. It's my canvas and If I want to deaden it I will. You should too. Lay it down quickly as shown. At each stage add the colours I show you to the one before it.
4, Add grey.
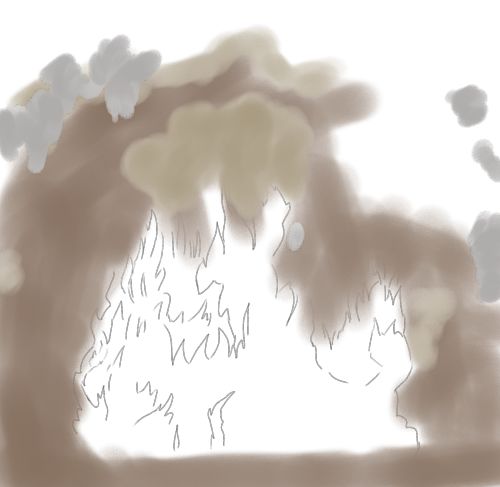
5, I made this colour by adding cadmium yellow and deep red in small amounts. If you can mix then you should be able to do this but if not and you have an approximate colour in your palette then use that to add to the current colour. A darkish, muted orange will do the job. For the flames I want you to add a very small amount of thinner to your paint. Just the corner of a brushful. I am using mineral spirits.
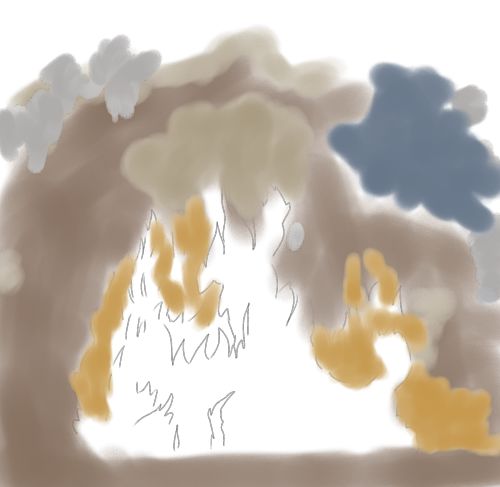
6, Brighten the colour with white and maybe a little yellow and apply as shown after adding a little thinner.
7, Add yellow to the same colour and apply. Don't forget to add the thinner.
8, Mix more yellow in and apply over the last yellow like I have. I'll remind you about the thinner once more and then leave you to it.
9, Add green to the mix and apply.
10, Here I added a brighter orange. Mix it or use from the tube, whatever suits you.
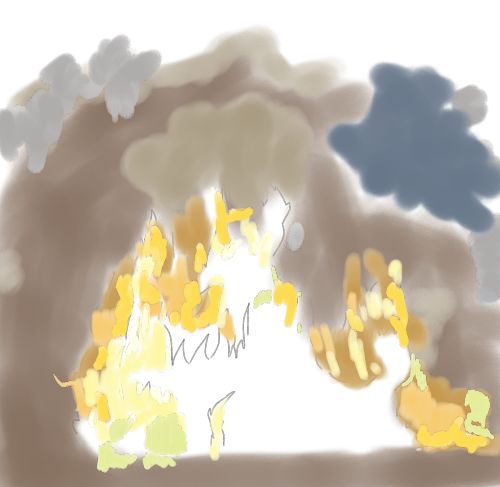
11, A brighter yellow, we're working towards the result.

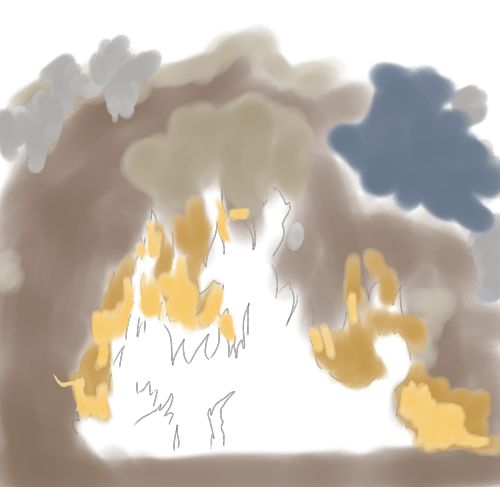
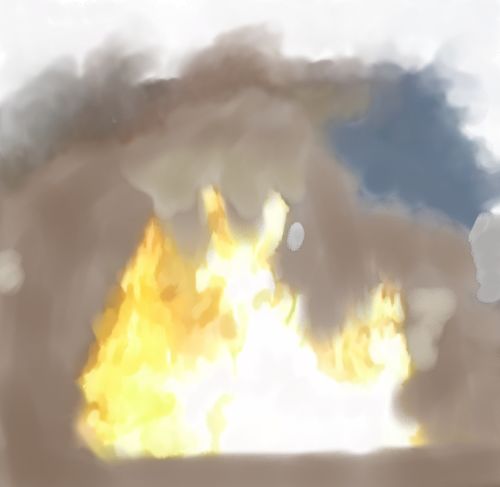
12, Now please add an extra dab of thinner than you added to all the previous colours to this light yellow which I made from zinc white and cadmium yellow, About 4 fifths white and one fifth yellow. I know I've gone over a lot of the other colours but it is deliberate.
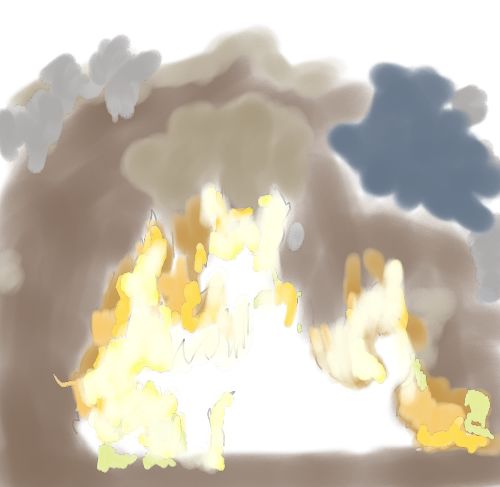
13, This is where we switch to blending. Starting at the top, your goal is to blend each colour seamlessly. Load a half inch Flatbrush and then take most of the thinner off. I just wiped it on the edge of the receptacle I had the thinner in. Draw the colours together with smooth strokes up, down and horizontally in that order only. Work on small areas of your flame painting at a time. This will take you longer than applying the paint in stages 2-12. I worked on the top of the painting to begin. Don't blend the lower parts of the smoke that surround the flames yet. When satisfied with the effect, draw the blended paint up into the top of the paper. You should get a thin smoky look as shown.
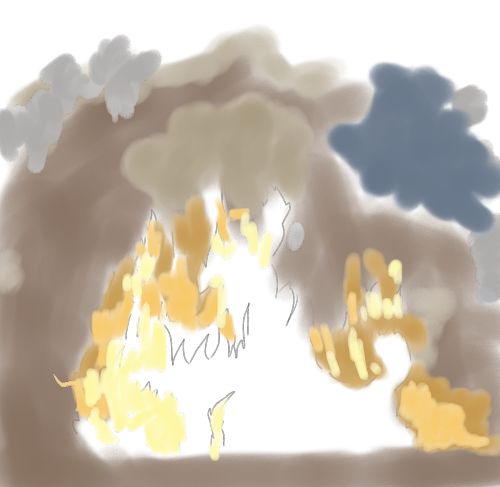
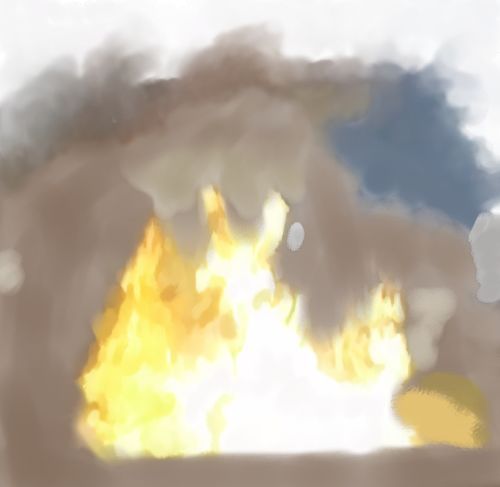
14, Now work on the flames. Use the same method of up, down and horizontal but I'd advise using #4 Round. When blending the tips of the flames into the smoke, flick the brush upwards vigorously.
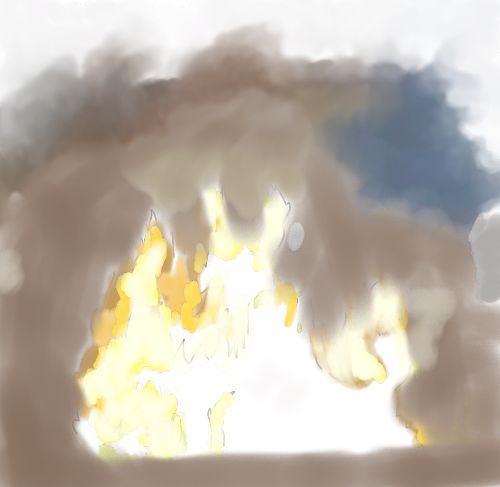
15, Continue to blend. There is no need to rush. Painting flames that dance wildly and energetically doesn't have to be done at speed.
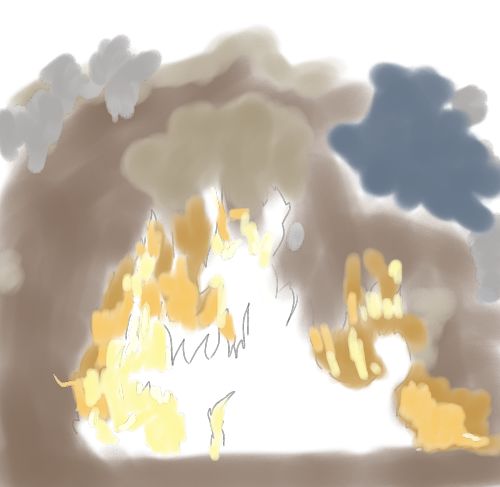
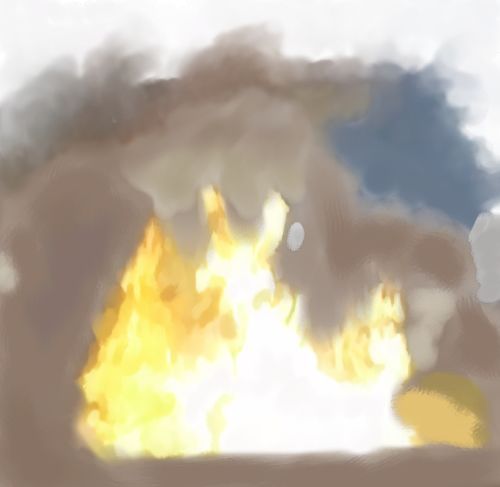
16, At this point I didn't like the look of the area to the bottom so I added more dark orange paint to it. That's the advantage of oils over acrylic and watercolour. You get all the time you need to adapt.
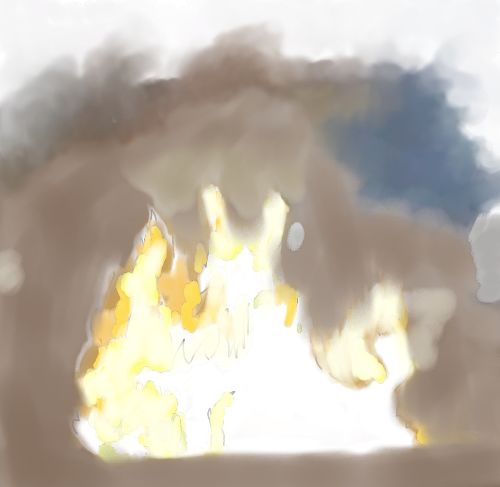
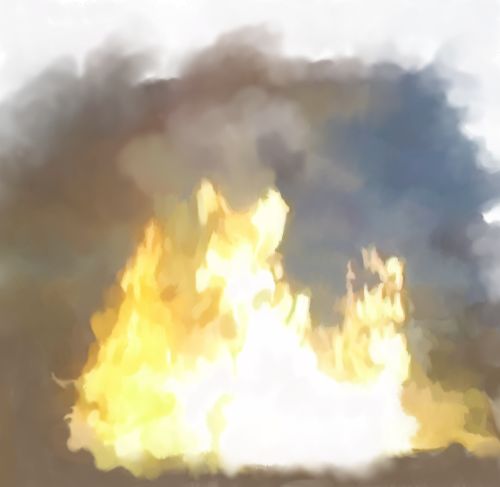
17, I made a decision to add more burnt umber to the smoke to contrast more strongly with the flames.
18, I finished off the flames and added some zinc white to the bare white area of the paper. This enabled me to blend the white into the darker area at the bottom. This is important to convey reality. Without it the illusion of smoke and fire would be compromised appearing graphic or worse, cartoony. Painting flames is best accomplished this way.
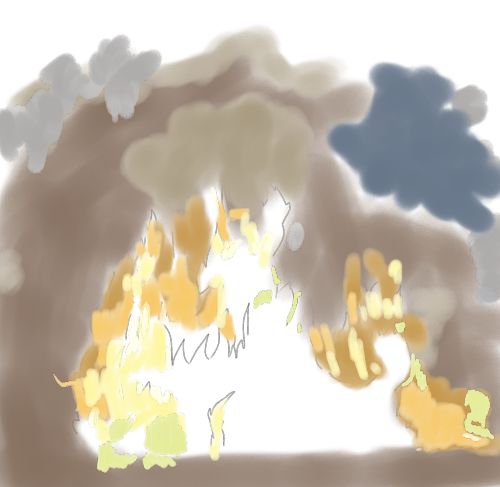
In conclusion Painting Flames has worked for these reasons. Using bare white paper/canvas at the centre of the flame gives the illusion of heat and light. The surrounding shades of yellow, orange, brown and green work because they give the illusion of a shifting, dancing scene where colours mix and change constantly. We have followed the loose and simple design of our initial drawing faithfully. The smoke looks like smoke because we have employed the oil painting technique of blending. Smoke starts strong and fades as it disperses. That is exactly what blended oil paints can be made to do. Fade when dispersed. The smoke has added an extra dimension of reality in our exercise in Painting Flames. We have got the balance between dark and light correct. Different colours in the smoke are showing us that something real is in fire. Real smoke is coloured by whatever is burning and it also 'soaks up' surrounding colours. Please take this tutorial and play around with the technique I have shown you. Oils are perfect for this kind of experimenting because of the slow drying time. Slow drying is what you need when flame drawing and painting. Practice, as always, is the key to developing your skills.
You may also be interested in flame drawing a tutorial in coloured inks. Do you have a painting (or work in progress) of flames to share with other users?It doesn't matter what medium or style. You can upload text and up to four images giving you the option of creating a mini-tutorial. Return from Painting Flames to Home
|

Drawing Animals Ebook
Learn how to draw animals in pencil with this huge 486 page ebook.

Or ask SBI directly how they can help you build a high traffic, highly profitable online business. Find Success with SBI!